20346D Module 2 Lab Answer Key
20346D Module 2 Lab Answer Key
Lab 2A: Managing Users, Groups, and Licenses
Scenario
Now that Heidi Leitner has set up a Lucerne Publishing trial tenant account and successfully registered the lucernepublishingXXXX.onmicrosoft.com domain, the company�s staff need to use the Office 365 interface during the pilot phase. As there has not yet been a decision on the final design, Heidi and the other Lucerne Publishing pilot users and IT staff are becoming familiar with the interface and the various administrative tasks. Chief among those tasks is the creation of users and groups, together with Office 365 and individual service license administration.
Objectives
To provide the students with practical experience of managing users, licenses, and groups by using both the Office 365 admin center and Windows PowerShell.
At the bare minimum, to save time, you can jump straight to Exercise 3. This will create enough users and groups to complete the rest of the lab exercises.
Lab Setup
Estimated Time: 75 minutes
Virtual machine: 20346C-LUC-CL1
Username: Student1
Password: Pa$$w0rd
Where you see references in the steps to lucernepublishingXXXX.onmicrosoft.com, you should replace XXXX with the unique Lucerne Publishing number that you entered when you set up your Office 365 accounts in Module 1, Lab 1B, Exercise 2, Task 3, Step 5.
Where you see references to labXXXXX.o365ready.com, you should replace XXXXX with the unique O365ready.com number you were assigned when you registered your IP address at www.o365ready.com in Module 2, Lab 2B, Exercise 1, Task 2, Step 6.
Exercise 1: Manage Users and Licenses by Using the Administration Center
Scenario
Heidi is learning about the practicalities of managing users and licenses in the Office 365 Admin Center. Her first task is to set up user accounts for the other Office 365 pilot users.
The main tasks for this exercise are as follows:
1.Creating Office 365 Users
2.Editing Office 365 Users
3.Verifying the Office 365 User Accounts
Task 1: Creating Office 365 Users
1. On your host (classroom) computer, ensure you are logged into the 20346C-LUC-CL1 virtual machine as Student1 with a password of Pa$$word.
2. On LUC-CL1, open Internet Explorer and browse to https://portal.office.com/.
3. Sign in as hleitner@lucernepublishingXXXX.onmicrosoft.com (where XXXX is your unique Lucerne Publishing number) with a password of Pa$$w0rd.
4. On the Heidi Leitner�s home page, which now says, �Install Office 2016 on your PC,� scroll down and select the Admin tile.
5. On the left-hand side, click Users and then click on Active Users after it expands.


9. In the Display name box, type the user�s first and last names if the default name does not appear; in this case, type Robert Schmid.
10. In the User name box, type rschmid.
11. Verify that LucernepublishingXXXX.onmicrosoft.com is listed in the text box after the �@ �sign (where XXXX is your unique Lucerne Publishing number).
12. Click "Save".
13. On the Create new user account results page, note the temporary password here ____________________
14. Click "Send an email and close".

NOTE: an email will be sent to Heidis account since she is a Global Administrator and the Office 365 tenant was created using her name. We will revisit the administrative accounts in a later Module.
15. Repeat steps 6 to 14 to create the following users: (using the first letter of the First name and all of the Last name as the User name; for example, wdouglas for William Douglas):
� William Douglas
� Justin Muller
� Rick Torres
� Mario Ledford
16.
Note their temporary passwords here:
NOTE: you can always get this info by going to Heidis Outlook emails
� William Douglas ____________________
� Justin Muller ____________________
� Rick Torres ____________________
� Mario Ledford ____________________
Task 2: Editing Office 365 Users
1. In the Office 365 admin console, in the Active Users list, select the check boxes for Mario Ledford and Rick Torres. The "Bulk actions" menu will be automatically displayed
2. On the right-hand side, click "Edit contact information".

4. Click "Close" to confirm then click "Save".
5. On the "Bulk actions" menu select "Edit sign-in status" section, select Blocked.
6. Click Save then click Close.
7. Select "Go to the old Admin Center"


10. On the left-hand side, click Details.
11. Click Additional details.
12. Verify that the Department box specifies Accounts.
13. On the left-hand side, click Settings.
14. Verify that Set sign-in status is set to Blocked.
15. Click Cancel.
16. In the Active Users list, under DISPLAY NAME, double click Rick Torres.
17. Repeat steps 10 to 15 to verify that this user has the same settings defined.
18. In the Active Users list, select the check box for Robert Schmid.
19. On the right-hand side, click the Delete symbol (Trash Can).
20. In the Delete User dialog box, click Delete and then click Close.
21. In Users, click Deleted users.
22. Verify that Robert Schmid is in this list.
23. In the Deleted users list, select the check box for Robert Schmid.
24. On the right-hand side, click Restore users.
25. Click Close.
26. Click Active Users.
27. Verify that Robert Schmid is in this list.
28. In the top right-hand corner of the screen, click the icon representing Heidi Leitner, then click Sign out.
29. Close Internet Explorer.
Task 3: Verifying the Office 365 User Accounts
1. On LUC-CL1, open Internet Explorer and browse to https://login.microsoftonline.com/.
2. Sign in as rschmid@lucernepublishingXXXX.onmicrosoft.com (where XXXX is your unique Lucerne Publishing number), with the temporary password noted in the previous task.
3. On the Update your password page, in the Old password box, type Robert�s temporary password.
4. In the New password and Confirm new password boxes, type Pa$$w0rd.
5. Click Update password and sign in.
6. If prompted, re-enter your new password, and click Sign in.
7. Verify that you can access Robert Schmid�s home page which now says, �Install Office 2016 on your PC.�
8. At the top right-hand of the page, click the icon representing Robert Schmid, and then click Sign out.
9. Note: If you have trouble signing out at any point, close and reopen Internet Explorer.
10. Open Internet Explorer and browse to https://login.microsoftonline.com/.
11. Sign in as rtorres@lucernepublishingXXXX.onmicrosoft.com (where XXXX is your unique Lucerne Publishing number), with the temporary password noted in the previous task.
12. Verify that you cannot log in and the message states that they are having trouble signing you in and that something went wrong.
13. Close Internet Explorer.
14. Open Internet Explorer and browse to https://login.microsoftonline.com/.
15. Sign in as hleitner@lucernepublishingXXXX.onmicrosoft.com (where XXXX is your unique Lucerne Publishing number), with a password of Pa$$w0rd.
16. On the Heidi�s home page which says at the top, �Install Office 2016 on your PC,� scroll down and select the Admin tile. Select "Go to the old Admin Center"
17. Click Users and then click Active Users.
18. In the Active Users list, select the check boxes for Mario Ledford and Rick Torres.
19. On the right-hand side, click Edit.
20. On the Details page, click Next.
21. On the Settings page, in the Set sign-in status section, select Allowed.
22. Click Next.
23. On the Licenses page, click Submit.
24. On the Results page, click Finish.
25. At the top of the page, click the drop-down box next to Heidi Leitner, then click Sign out.
26. Open Internet Explorer and browse to https://login.microsoftonline.com/.
27. Sign in as rtorres@lucernepublishingXXXX.onmicrosoft.com (where XXXX is your unique Lucerne Publishing number), with the temporary password noted in the previous task.
28. On the Update your password page, in the Old password box, type Rick�s temporary password.
29. In the New password and Confirm new password boxes, type Pa$$w0rd.
30. Click Update password and sign in.
31. If prompted, re-enter your new password, and click Sign in.
32. Verify that you can access Rick�s home page which now says, �Install Office 2016 on your PC.�
33. At the top right-hand of the page, click the icon representing Rick Torres, and then click Sign out.
Result: User accounts and licenses are created and managed according to business needs.
Exercise 2: Manage Security and Distribution Groups
Scenario
Heidi is satisfied with the process of creating user accounts and assigning them licenses. She now wants to practice managing those users through security and distribution group membership.
The main tasks for this exercise are as follows:
1. Creating Office 365 Security Groups
2. Creating Exchange Online Security and Distribution Groups
3. Managing Security Groups
Task 1: Creating Office 365 Security Groups
1. On LUC-CL1, open Internet Explorer and browse to: https://login.microsoftonline.com/
2. Sign in as hleitner@lucernepublishingXXXX.onmicrosoft.com (where XXXX is your unique Lucerne Publishing number), with a password of Pa$$w0rd.
3. On Heidi�s home page which now says, �Install Office 2016 on your PC,� scroll down and select the Admin tile. Select "Go to the old Admin Center"
4. On the left-hand side, click Groups.
5. Click the + (Add) symbol.
6. On the Create security group page, in the Group name box, type Sales.
7. In the Description box, type Sales Department users.
8. Click Create.
9. Click Edit members, which appears below Created Sales group successfully.
10. Click the Robert Schmid MEMBER option.
11. In the Group Member Picker window, enter Robert Schmid in the search box and select it, enter William Douglas in the search box and select it, and then click Add.
12. Click on Close. This should take you back to the Sales security group page. Click on the Back arrow.
13. Click the + (Add) symbol.
14. On the Create security group page, in the Group name box, type Accounts.
15. In the Description box, type Accounts Department users.
16. Click Create.
17. Click Edit members, which appear below Created Accounts group successfully.
18. Under the Members section, click the ADD MEMBER option.
19. In the Group Member Picker window, enter Mario Ledford in the search box and select it, enter Rick Torres in the search box and select it, and then click Add.
20. Click on Close. This should take you back to the Accounts security group page. Click on the Back arrow.
Task 2: Creating Exchange Online Security and Distribution Groups
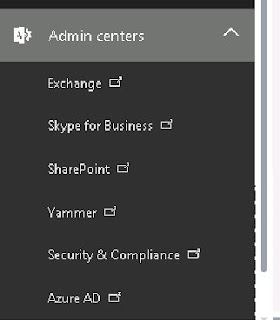
1. If you are back at the Office 365 Admin Center, click Exchange. Otherwise, on Heidi�s home page, scroll down and select the Admin tile. Then, click Exchange.
3. In Recipients section, click Groups.
4. Click the drop-down arrow next to the + (New) symbol.
5. In the drop-down list, click Distribution group.
6. In the Distribution Group window, in the Display name box, type Sales Distribution.
7. In the Alias box, type salesdist.
8. In the Email address box, accept the default address.
9. In the Description box, type Distribution group for sales department.
10. Scroll down the form, then under Members, uncheck the Add group owners as members check box.
11. Click the + (Add) symbol.
12. In the Select Members window, select Robert Schmid and click Add.
13. In the Select Members window, select William Douglas and click Add.
14. Click OK.
15. In the Distribution Group window, click Save.
16. Click the drop-down arrow next to the + (New) symbol.
17. In the drop-down list, click Distribution group.
18. In the New Distribution Group window, in the Display name box, type Accounts Distribution.
19. In the Alias box, type accountsdist.
20. In the Email address box, accept the default address.
21. In the Description box, type Distribution group for accounts department.
22. Under Members, clear the Add group owners as members check box.
23. Click the + (Add) symbol.
24. In the Select Members window, select Rick Torres and click Add.
25. In the Select Members window, select Mario Ledford and click Add.
26. Click OK.
27. In the New Distribution Group window, click Save.
28. In the Exchange admin center console, in the Recipients node, click Groups, and then click the drop-down arrow next to the + (New) symbol.
29. In the drop-down list, click Security group.
30. In the New Security Group window, in the Display name box, type Sales Security.
31. In the Alias box, type salessec.
32. In the Email address box, accept the default address.
33. In the Description box, type Exchange security group for sales.
34. Under Members, clear the Add group owners as members check box.
35. Click the + (Add) symbol.
36. In the Select Members window, select Robert Schmid and click Add.
37. In the Select Members window, select William Douglas and click Add.
38. Click OK.
39. In the New Security Group window, click Save.
40. Click the drop-down arrow next to the + (New) symbol.
41. In the drop-down list, click Dynamic distribution group.
42. In the New Dynamic Distribution Group window, in the Display name box, type Accounts Dynamic.
43. In the Alias box, type acctsdynamic.
44. In the Description box, type Dynamic distribution group for accounts.
45. Under Owner, click Browse.
46. In the Select Owner window, click Heidi Leitner and click OK.
47. Under Members, click Only the following recipient types.
48. Select the Users with Exchange mailboxes check box.
49. Click Add a rule.
50. In the drop-down list select Department.
51. In the Specify words or phrases dialog box, type Accounts.
52. Click the + (Add) symbol.
53. Click OK.
54. In the Accounts Dynamic window, click Save.
55. Verify that the following groups now exist in the Groups list:
� Sales Distribution
� Accounts Distribution
� Sales Security
� Accounts Dynamic
Task 3: Managing Security Groups
1. In the Exchange Admin Center, click Admin in the black bar in the top left, which should take you back to the Office 365 Admin Center. (If you are not in the Office 365 Admin Center tab, scroll down and select the Admin tile and then proceed with the step.)
2. On the left-hand side, click Groups.
3. Verify that you can see the following groups:
� Sales Distribution
� Accounts Distribution
� Sales Security
4. Verify that you cannot see the Accounts Dynamic group.
5. In the Groups list, clear the check box for Accounts (if it was selected by default), and select the check box for the Accounts Distribution group.
6. Under Security group section, click the Edit Members and Owners symbol (Pencil).
Note: At one time, you could not edit system security groups, distribution groups, and mail-enabled security groups from this interface. (You actually will now be able to edit all of the visible groups from the Office 365 Admin Center.
7. Click the Back arrow to return to Groups in the Office 365 (old) Admin Center.
8. In the Groups list, clear the check box for Accounts Distribution (if still selected), and select the check box for the Sales Security group.
9. Under Security group section, click Edit Members and Owners symbol (Pencil).
10. Note that you can edit the properties of this Office 365 security group.
11. On the Sales Security group page, click Add Member.
12. In the Add members to the group Sales window, enter Justin Muller in the search box and select it. Click Add, and then click Close.
13. You may have to refresh to ensure that Justin Muller is now a member of Sales. Click the Back arrow.
14. In the Groups list, select the check box for the Sales Security group.
15. To the right of the groups list, in the Security group section, click the Delete Group symbol (Trash Can).
16. In the Warning box, click Yes.
17. Click Active Users.
18. Confirm that Justin Muller�s account still exists in the list of users.
Result: You have created a group structure based on the security need within Lucerne Publishing.
Exercise 3: Manage Cloud Identities with Microsoft PowerShell
Scenario
Heidi is not a PowerShell expert, but she is determined to become more familiar with it and find out how it can help automate the processes of administering Office 365 user and group accounts. The Pilot Phase of the FastTrack process is a good time to learn these new skills and PowerShell syntax.
PowerShell Tip
Throughout this course, you will be tasked with entering a number of PowerShell commands. A Microsoft Word document is in your lab environment. You can use the �Paste Clipboard Text option in the LODS environment (Accessible from the �Commands� menu) to paste the cmdlets, rather than having to type them.) This will not only save you a lot of time and effort, but it will minimize potential errors should you accidentally mistype command strings.
Perform the following steps to copy and paste PowerShell commands from the Microsoft Word document:
1. Highlight and right-click the command that you must enter in the lab.
2. Click Copy.
3. From the virtual machine menu bar, click Commands, highlight Paste, and then click Paste Clipboard Text.
The main tasks for this exercise are as follows:
1. Managing Users, Groups, and Licenses with Windows PowerShell
2. Bulk Provision Users with Windows PowerShell
Task 1: Managing Users, Groups, and Licenses with Windows PowerShell
1. On LUC-CL1, on the desktop, right-click the Windows Azure Active Directory Module for Windows PowerShell shortcut and click Run as administrator.
2. If a User Account Control dialog box appears, click Yes.
3. At the PS prompt, type the following command and press Enter (If you paste your cmdlet in and see a Warning that states, �Do you want to allow this webpage to access your clipboard?� Select Allow access. Connect-msolservice
4. In the Enter Credentials dialog box log in as hleitner@lucernepublishingXXXX.onmicrosoft.com (where XXXX is your unique Lucerne Publishing number), with a password of Pa$$w0rd.
NOTE: you can test your connection to Office 365 by typing
get-msoluser
If you get an error then ask your instructor for help
5. At the PS prompt, type the following command and press Enter (where XXXX is your unique Lucerne Publishing number): New-MsolUser -UserPrincipalName elabrecque@LucernePublishingXXXX.onmicrosoft.com -DisplayName �Elisabeth Labrecque� -FirstName �Elisabeth� -LastName �Labrecque� -Password �Pa$$w0rd� -ForceChangePassword $false -UsageLocation �CH�
6. At the PS prompt, type the following command and press Enter (where XXXX is your unique Lucerne Publishing number). New-MsolUser -UserPrincipalName lmartin@LucernePublishingXXXX.onmicrosoft.com -DisplayName �Liane Martin� -FirstName �Liane� -LastName �Martin� -Password �Pa$$w0rd� -ForceChangePassword $false -UsageLocation �CH�
7. To create a Marketing group, at the PS prompt type the following command and press Enter: New-MsolGroup -DisplayName �Marketing� -Description �Marketing Department users�
8. To configure a variable for the group, at the PS prompt type the following command and press Enter: $MktGrp = Get-MsolGroup | Where-Object {$_.DisplayName -eq "Marketing"}
9. To configure a variable for the first user account, at the PS prompt type the following command and press Enter: $ELabrecque = Get-MsolUser | Where-Object {$_.DisplayName -eq "Elisabeth Labrecque"}
10. To configure a variable for the second user account, at the PS prompt type the following command and press Enter: $LMartin = Get-MsolUser | Where-Object {$_.DisplayName -eq "Liane Martin"}
11. To add Elisabeth Labrecque to the Marketing group, at the PS prompt type the following command and press Enter: Add-MsolGroupMember -GroupObjectId $MktGrp.ObjectId -GroupMemberType "User" -GroupMemberObjectId $ELabrecque.ObjectId
12. To add Liane Martin to the Marketing group, at the PS prompt type the following command and press Enter: Add-MsolGroupMember -GroupObjectId $MktGrp.ObjectId -GroupMemberType "User" -GroupMemberObjectId $LMartin.ObjectId
13. To verify the members of the Marketing group, at the PS prompt type the following command and press Enter: Get-MsolGroupMember -GroupObjectId $MktGrp.ObjectId
14. To determine which users are unlicensed, at the PS prompt type the following command and press Enter: Get-MsolUser -UnlicensedUsersOnly
15. To license Elizabeth Labrecque, at the PS prompt type the following command and press Enter (where XXXX is your unique Lucerne Publishing number): Set-MsolUserLicense -UserPrincipalName elabrecque@LucernePublishingXXXX.onmicrosoft.com -AddLicenses �LucernePublishingXXXX:ENTERPRISEPACK�
16. To license Liane Martin, at the PS prompt type the following command and press Enter (where XXXX is your unique Lucerne Publishing number): Set-MsolUserLicense -UserPrincipalName lmartin@LucernePublishingXXXX.onmicrosoft.com -AddLicenses �LucernePublishingXXXX:ENTERPRISEPACK�
17. To prevent a user from signing in, at the PS prompt type the following command and press Enter (where XXXX is your unique Lucerne Publishing number): Set-MsolUser -UserPrincipalName elabrecque@LucernePublishingXXXX.onmicrosoft.com -blockcredential $true
18. To delete a user, at the PS prompt type the following command and press Enter (where XXXX is your unique Lucerne Publishing number): Remove-MsolUser -UserPrincipalName elabrecque@lucernepublishingXXXX.onmicrosoft.com -Force
19. To view the Deleted Users list, at the PS prompt type the following command and press Enter: Get-MsolUser -ReturnDeletedUsers
20. Verify that Elisabeth Labrecque is included in the Deleted Users list. Note that it specifies that she is still licensed.
21. To restore a deleted user, at the PS prompt type the following command and press Enter (where XXXX is your unique Lucerne Publishing number): Restore-MsolUser -UserPrincipalName elabrecque@lucernepublishingXXXX.onmicrosoft.com
22. To view the Deleted Users list, at the PS prompt type the following command and press Enter: Get-MsolUser -ReturnDeletedUsers
23. Verify that Elisabeth Labrecque is no longer in the Deleted Users list.
24. To view the Active Users list, at the PS prompt type the following command and press Enter: Get-MsolUser
25. Verify that Elisabeth Labrecque is included in the Active Users list.
26. To allow a user to sign in, at the PS prompt type the following command and press Enter (where XXXX is your unique Lucerne Publishing number): Set-MsolUser -UserPrincipalName elabrecque@LucernePublishingXXXX.onmicrosoft.com -blockcredential $false
Task 2: Bulk Provision Users with Windows PowerShell
1. On LUC-CL1, on the taskbar, click File Explorer.
2. In File Explorer, navigate to E:LabfilesLab02.
3. Right-click O365users.csv, click Open with, and click Notepad.
4. Click Edit, and then click Replace.
5. In Find what, enter XXX.
6. In Replace with, enter your unique four-character number from your Office 365 domain (as in lucernepublishingXXXX.onmicrosoft.com).
7. Click Replace All.
8. Click Cancel.
9. Check that the XXXX entries have been replaced with your unique Lucerne Publishing number.
10. Close O365Users.csv and in the Notepad message box, click Save.
11. To bulk import several users from a CSV file, copy and paste this code into the Administrator: Windows Azure Active Directory Module for Windows PowerShell window on LUC-CL1 and press Enter: Import-Csv -Path e:labfileslab02O365Users.csv | ForEach-Object { New-MsolUser -UserPrincipalName $_."UPN" -AlternateEmailAddresses $_."AltEmail" -FirstName $_."FirstName" -LastName $_."LastName" -DisplayName $_."DisplayName" -BlockCredential $False -ForceChangePassword $False -LicenseAssignment $_."LicenseAssignment" -Password $_."Password" -PasswordNeverExpires $True -Title $_."Title" -Department $_."Department" -Office $_."Office" -PhoneNumber $_."PhoneNumber" -MobilePhone $_."MobilePhone" -Fax $_."Fax" -StreetAddress $_."StreetAddress" -City $_."City" -State $_."State" -PostalCode $_."PostalCode" -Country $_."Country" -UsageLocation $_."UsageLocation" }
12. To view the Active Users list, at the prompt type the following command and press Enter: Get-MsolUser
13. Switch back to Internet Explorer, click Admin, and then click Office 365.
14. On the left column, click Users and then click Active Users.
15. Review the active users that you have just imported. (You may need to click the recycle icon to refresh.)
16. In the left hand pane, click Admin and then click Exchange.
17. In the Recipients node, review the mailboxes and associated email addresses that have been created.
Result: Heidi can use Windows Azure PowerShell to manage Lucerne Publishing user and group accounts in Office 365.
Lab 2B: Continue Lucerne Publishing Datacenter Setup
Scenario
This lab continues setting up the Lucerne Publishing Datacenter.
Objectives
By the end of this lab, you will have:
�Installed and configured Exchange Server.
�Checked that the datacenter environment is working correctly.
Lab Setup
Estimated Time: 60 minutes
Virtual machine: 20346C-LUC-CL1
Username: Student1
Password: Pa$$w0rd
You should continue this setup using the same Windows Azure session that you used in Lab 1A.
Exercise 1: Set Up the Exchange Server
Scenario
This exercise continues setting up the Lucerne Publishing Datacenter by installing Exchange Server 2013 into your domain.
The main tasks for this exercise are as follows:
1. Obtain Your Student DNS Domain Name
2. Install Exchange 2013 into your Domain
3. Verify the Exchange Server Installation
Task 1: Obtain Your Student DNS Domain Name
1. Switch to LUC-DC1 by using the drop-down menu and selecting LUC-DC1 in the LODS interface or by clicking the �Machines� tab and selecting LUC-DC1 in the bar to the right. Log in as LucAdmin with a password of Pa$$w0rd.
2. Close Server Manager.
3. On the traditional desktop, double-click the Connect to Internet icon.
4. On the black menu bar at the top, select �Commands� and then, Windows Key � Windows Key to get to the Start screen. On the Start screen, type: cmd and press Enter.
5. At the command prompt, type: ipconfig and press Enter.
6. Note the IP address of Webnet to use in the rest of the course. This represents the public IP address of the Lucerne Publishing datacenter.

Note: You will be required to use this address in several of the following labs, so it is recommended that you save it in a text file on to your desktop.
8. Switch back to LUC-CL1 by using the drop-down menu and selecting LUC-CL1 in the LODS interface or by clicking the �Machines� tab and selecting LUC-CL1 in the bar to the right. On LUC-CL1, on the taskbar, click Internet Explorer.
9. In the address box, type http://www.O365Ready.com and then press Enter. This will take you to the Ignite Lab Number Provisioning Tool. You will be generating a Lab Number that will be unique for you in this class.
10. Select Generate Student Lab Number. Scroll down and type in your public IP address from Step 7 above, and then click Submit.
11. Write down your five-digit O365Ready Lab domain for future reference:
Student Lab Number ____________________,
which will make your sub domain: lab____________________.o365ready.com
Note: This is your DNS sub-domain. You should use this in all subsequent labs wherever you see labXXXXX.o365ready.com in the instructions.
12. Return to the Windows Azure Active Directory Module for Windows PowerShell if you still have it open or open Windows PowerShell.
13. At the prompt, type nslookup labXXXXX.o365ready.com (replacing XXXXX with the number from Step 6 above) and press Enter.
Note: You may get a failure message at this point which is caused by DNS propagation delays. If so, return to this step after you have completed the next task, �Install Exchange 2013 into your Domain�.
14. Either now or after Task 2, verify that the returned IP address value matches the one you recorded in Step 3.
NOTE: you can try OpenDNS to resolve


Comments
Post a Comment